My podcast editing workflow in REAPER
Published on
I divide podcast post-production into two parts:
- Editing: cutting and moving the audio around. This includes reducing pauses (or sometimes adding them), removing parts that didn’t turn out interesting, and cutting out some excessive filler sounds. The goal here is to make the conversation concise, engaging, and easy to listen to.
- Mixing: figuring out which plugins/effects to apply so that the resulting audio sounds good.
This is not to say that editing and mixing happens in this strict order; on the contrary, while editing, I notice things that could be improved and adjust the plugin chains accordingly. But it’s useful to distinguish these two concepts.
Here is my podcast editing check-list for REAPER, which I’ll elaborate on below:
- Create the project; import and align the tracks
- Normalize each track to 0dB and adjust their gain
- Apply dynamic split/noise gate to each track
- Edit at item boundaries
- Re-listen and make final edits
Create the project; import and align the tracks
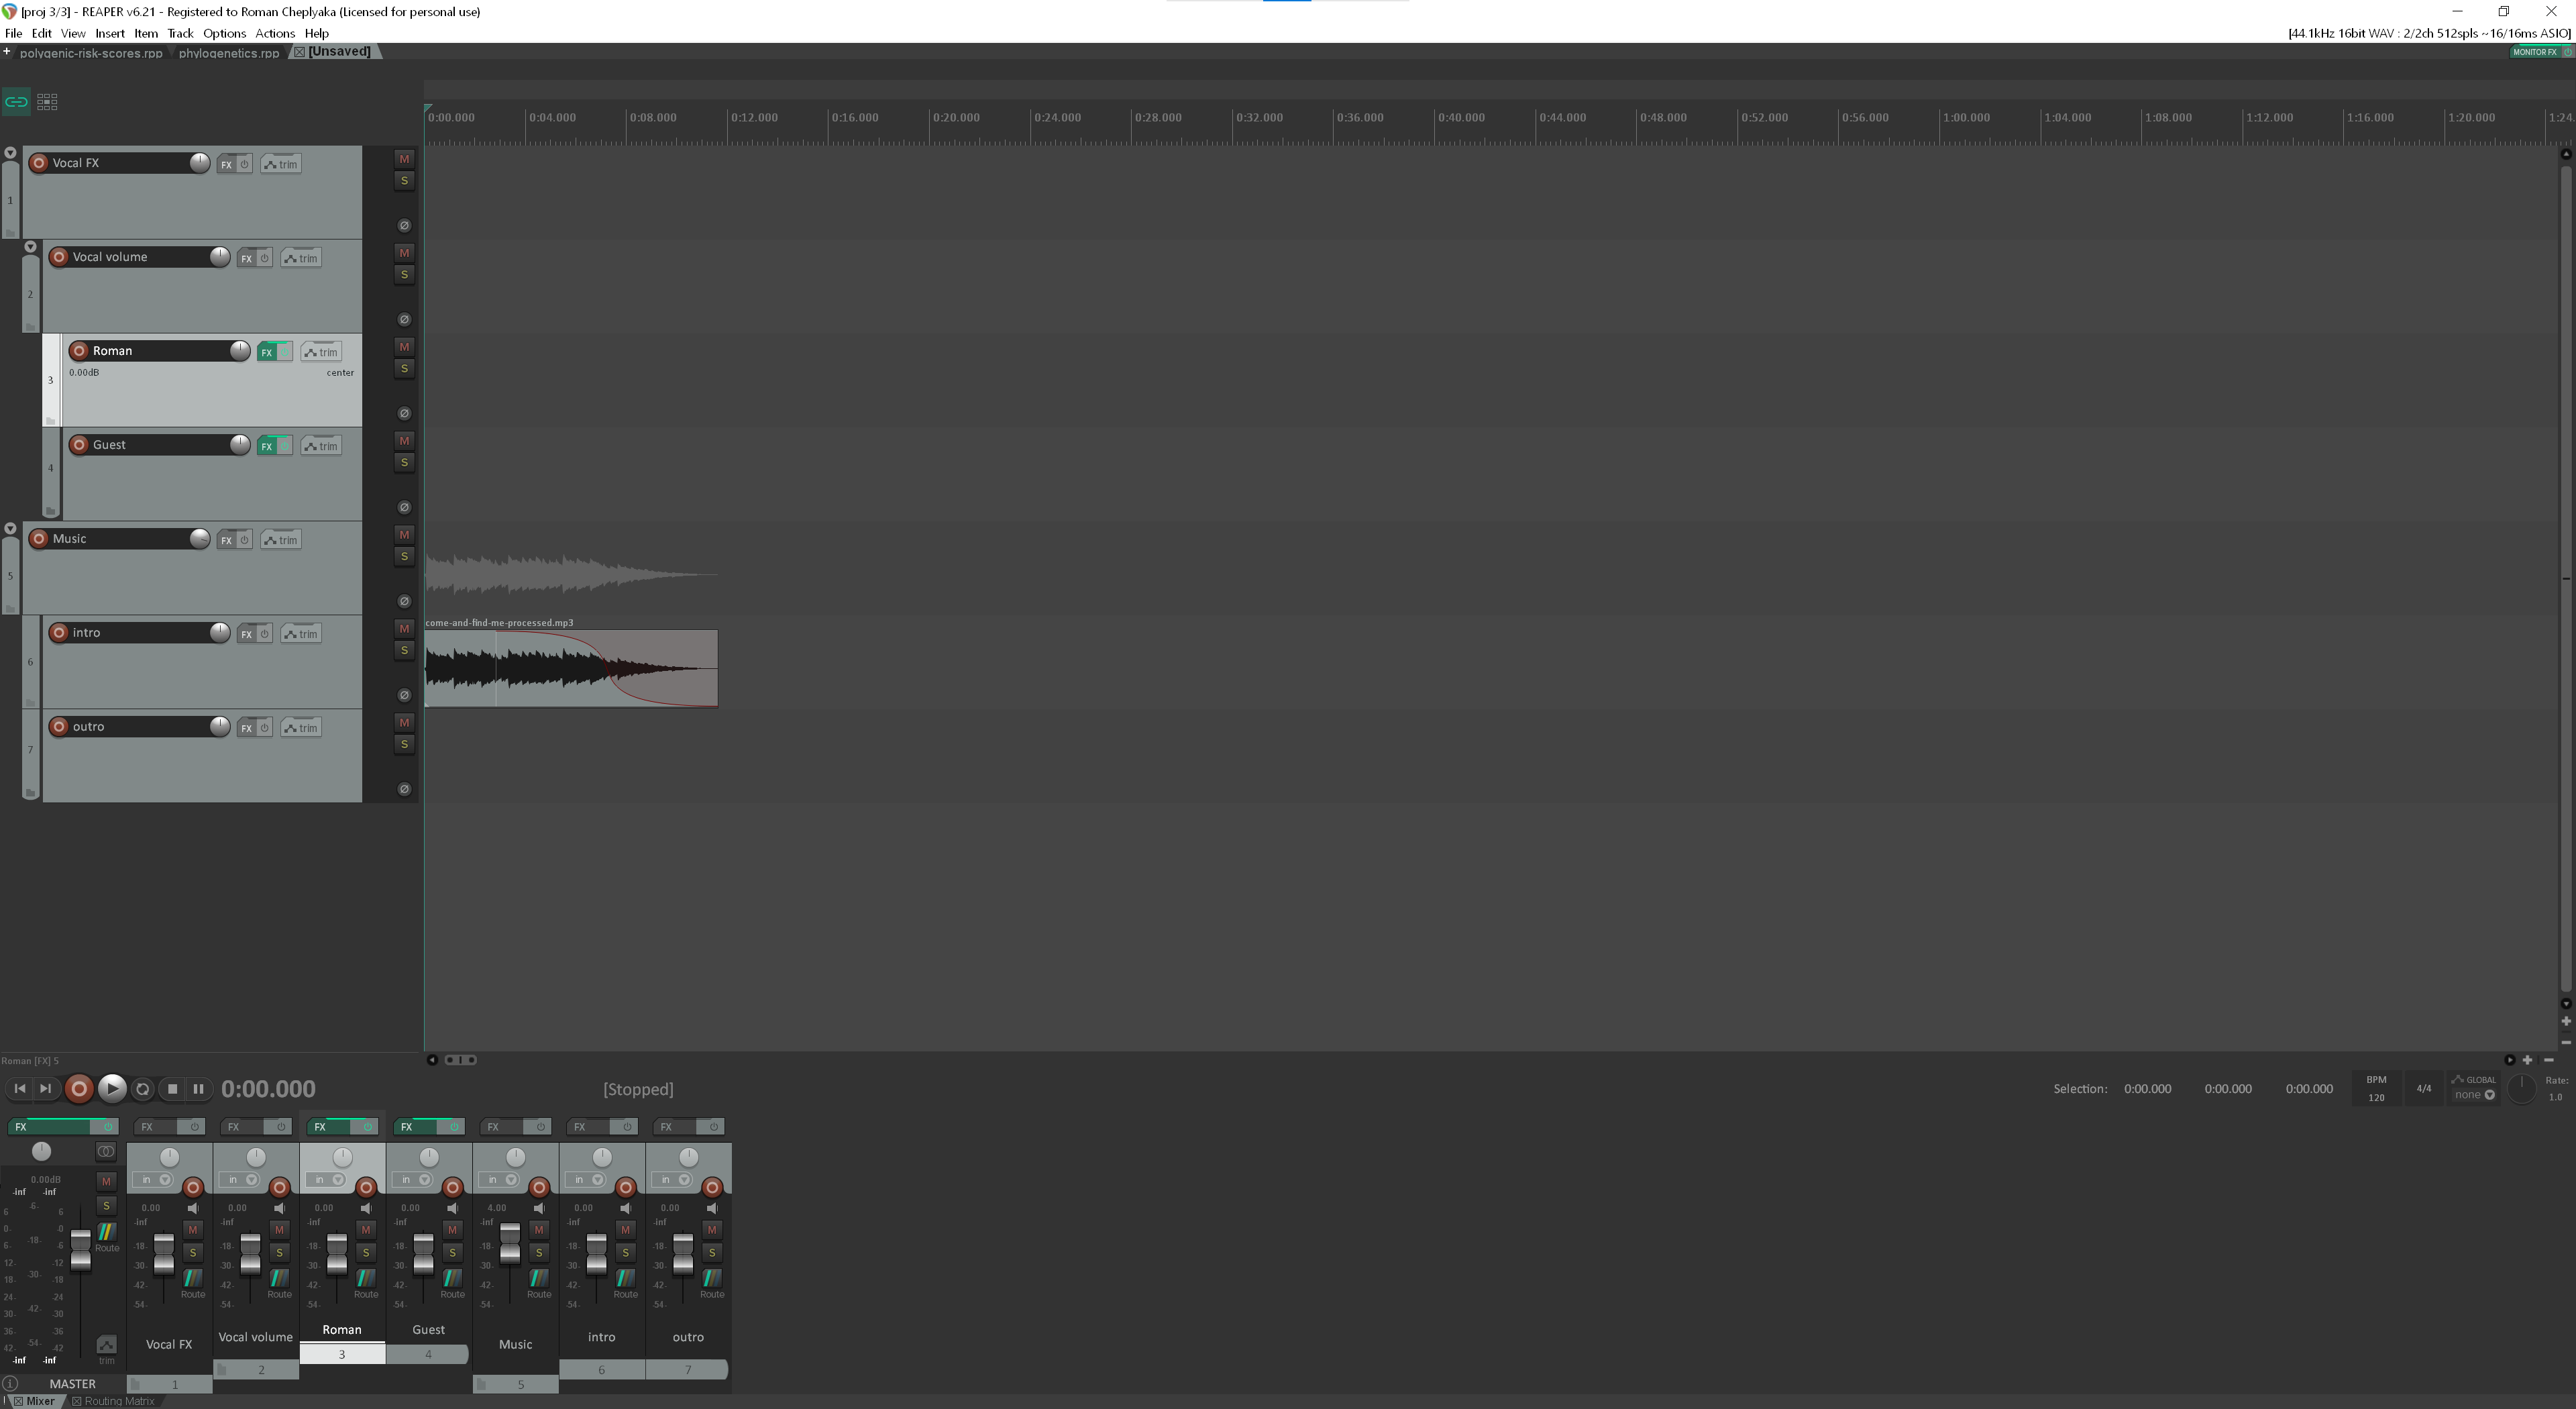
To create a project, it’s convenient to use a template that contains a standard set of tracks (including the intro/outro music) and effects. Here is what mine looks like:
Normalize
When recording, I set the gain very conservatively to prevent clipping. As a result, an individual raw track may peak at as low as -15dB. So the first thing I do is normalize each track to peak at 0dB. This has little to do with the final volume of the track (which will be controlled by the volume faders/knobs), but normalizing tracks achieves a few nice things:
- It makes the waveform easier to read.
- When setting up the compressor and other plugins, it makes the threshold a more sane and standard level (e.g. -25dB instead of -40dB).
- By default, volume faders in reaper go up to +20dB, so if raw track peaks at -15dB, the fader may not have enough gain to bring the audio to the right level.
Dynamic split


The dynamic split (or more precisely, the way I use it) acts like a noise gate; that is, its main goal is to silence the parts where the person is not talking. However, it has two big advantages over simply applying a noise gate effect:
- I can visually see which parts are silenced, and adjust them by dragging the item edges.
- I can easily move the non-silent parts around — whether I need to rearrange parts of the conversation or just fine-tune the pause between different speakers.
Here are my typical settings for the dynamic split.
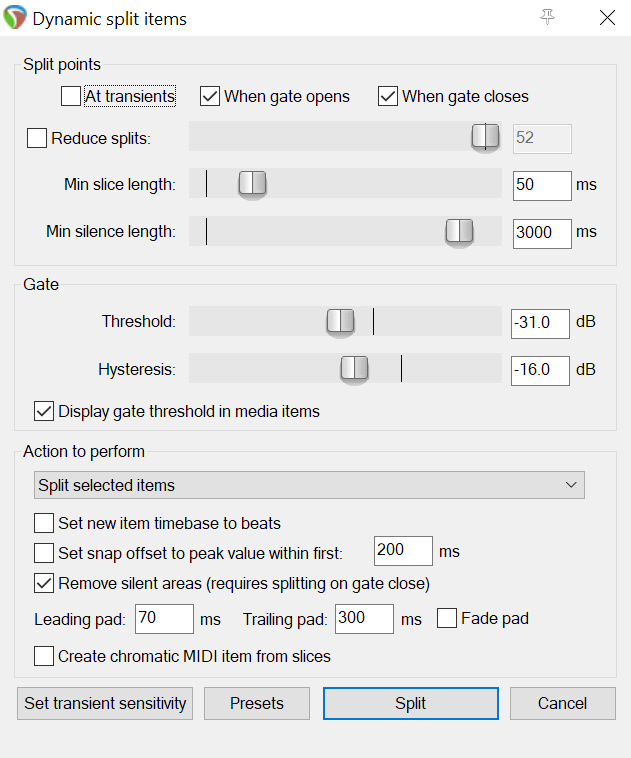
There are some obvious settings like min slice and silence lengths and the threshold/hysteresis; and then there are somewhat less obvious settings that are worth paying attention to.
Leading and trailing pads are simply extra bits of sound that are left untouched even after the audio goes under the threshold (trailing pad) or before it emerges from below the threshold (leading pad). Without the pads, I would either have to set the threshold too conservatively, or manually adjust all the items, un-silencing the parts where a person starts or finishes talking.
You’ll also notice that I left the ‘Fade pad’ box unchecked. This is because a fade would span the whole pad, and a 300ms or even a 70ms fade is too large.
However, I do want the fades to smooth the edges of the items. So after a dynamic split, I select all the items, go to Item Properties, and manually set the fades to 0.03 (i.e. 30ms). This affects all the selected items.
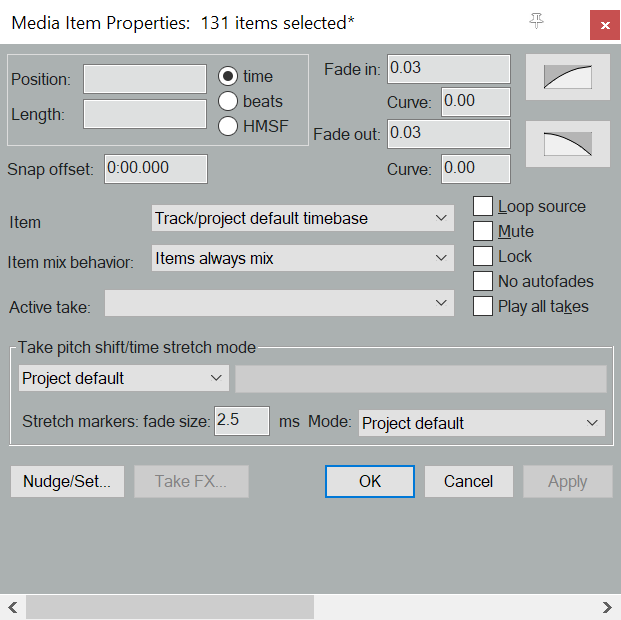
Tip: make sure to unselect the items after this. If you start editing (e.g. resizing) items, all selected items will be affected, creating a big mess.
Edit at item boundaries
At this stage I just go through all the places where one person stops and another starts talking. These are the places that require the most editing, so I like to take care of them first, without having to listen to the whole recording.
Re-listen and make final edits
At this point, I listen to the full length episode, and make the final edits as needed. Sometimes I do this in REAPER, but mostly I like to render the episode and take it for a walk, writing down the timestamps where an edit is needed.
Tip: when applying edits according to a list of timestamps, move through them in the direction from the end towards the beginning of the episode. Otherwise, earlier edits will affect the timestamps that occur later in the episode.